Digital Processes
In this segment, taken from his 2008 talk at the Museum of Modern Art, New York, for his exhibition The Printed Picture, Richard Benson walks us through the basics of the digital processes associated with printing. He gives an overview of weaving, photo offset lithography, process color in offset printing, web offset printing, offset as an art medium, the piano roll, IBM punch cards, laser prints, the Canon Color Copier, digital halftones and stochastic printing, iris prints, dye-sublimation printing, inkjet printing, and digital chromogenic prints. Pictures associated with each of the main themes presented in the segment can be found by clicking on any of the fields below.
Digital Processes Introduction (25:41 - 28:40)
-
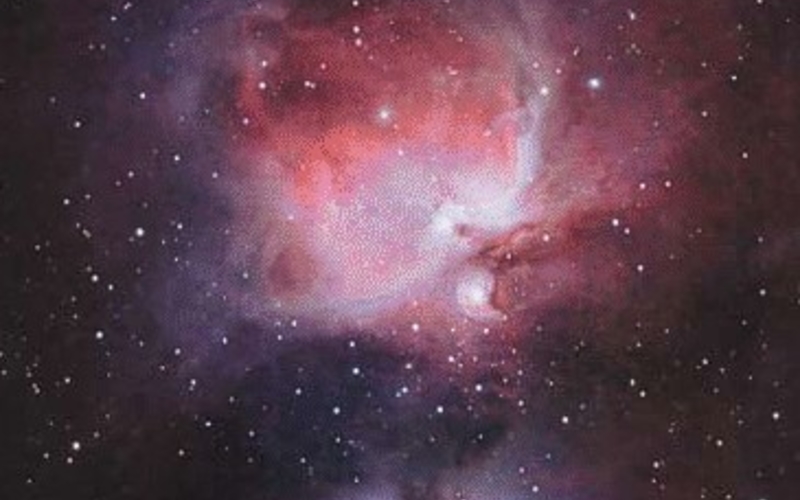 Photo offset lithography. Steve Cannistra. Orion Nebula from Sky and Telescope magazine, May 2004. 2004. 10 1/16 x 6 9/16" (25.6 x 16.6 cm). The Museum of Modern Art, New York. Gift of Richard Benson © Steve Cannistra. The photograph was made by a gifted amateur using digital technology and a small telescope.The digital revolution, which first showed its colors in the 1980s, has swept traditional photography away far faster than anyone expected. My book The Printed Picture and this site deal with printing, and so ignore the great transformation of cameras from analog to digital devices. But whether used to take pictures or to print them, the old chemical processes are near death and digital media rule the photographic world. Those who don’t believe this are almost always over sixty years of age. This section deals—briefly—with some of the new printing systems.Photo Offset Lithography
The Piano Roll (20:29 - 22:38)
-
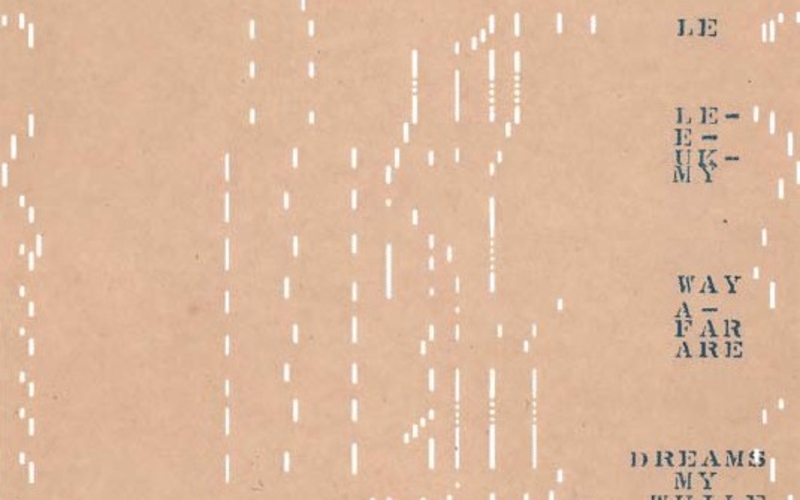 Punched paper with letterpress text. Artist unknown. Section of a piano roll. c. 1920. 16 1/2 x 10 1/2" (41.9 x 26.7 cm). The Museum of Modern Art, New York. Gift of Richard Benson. A section of a piano roll holding musical information in the perforated holes and libretto information in printed words to be read by the singer (who appears to be playing the piano). The roll moves downward as it is being played, so time is measured along its length, while bass notes are to the left and treble to the right, so musical tone is described across its width.This is a section of a player piano roll, in which punched holes record the notes for an automated piano to play. The roll does two things: it stores information about the music and it instructs the piano how to play that music. We tend to be muddled about this distinction. The distinction is important, because devices such as this roll are the roots of the digital age, and we can’t understand the computer and its power if we aren’t clear about what tool does what job. This strip of paper (cut from a far longer roll) acts as a memory device (like our computer’s hard drive) but it is also an active tool used in making the music.The holes in the roll are all round—those that look like long cut-out lines are just a series punched closely together so that they overlap and make a continuously open section. The surface of the paper in any given area is either solid or not, and this division of the sheet into either of two conditions means that the information recorded there is binary. Only two conditions are possible on the paper; there is either a hole or not—nothing exists in between. We have already wrestled with the problem of ink on paper being binary—there is either a black mark, or the white paper, and nothing in between. Much of the technological development in printing has been aimed at getting around the problem of the binary nature of ink—at giving the black bits of pigment the appearance of tone. Here, on the piano roll, we see exactly the opposite going on: the roll has been made to transform the continuous—we say analog—nature of music into a binary code that can store it and then translate it back into sounds. The central activity in the digital age may be the computer’s manipulation of numbers, but a huge amount of effort is spent on the task of translation. Information must be translated from some data source in the world into the form in which the computer can handle it, and then, later on, that information must be translated back out, into a new version that may or may not be similar to the form originally imported. The word we use for this translation of information into the computer is “digitized.” By this we mean that the smoothly varying information of the world is turned into discrete values that can somehow be stored. In the piano roll those values have a binary form, but we always need to remember that digitization does not necessarily mean something has become binary. We could just as easily turn to a system that used more than two states, such as the method we use to count: for our day-to-day handling of numbers we use ten different ones, and so we say that our counting system is “base ten,” whereas the computer does all its work with “base two.”Punched Paper with Letterpress Text
IBM Punch Cards (22:47 - 23:59)
-
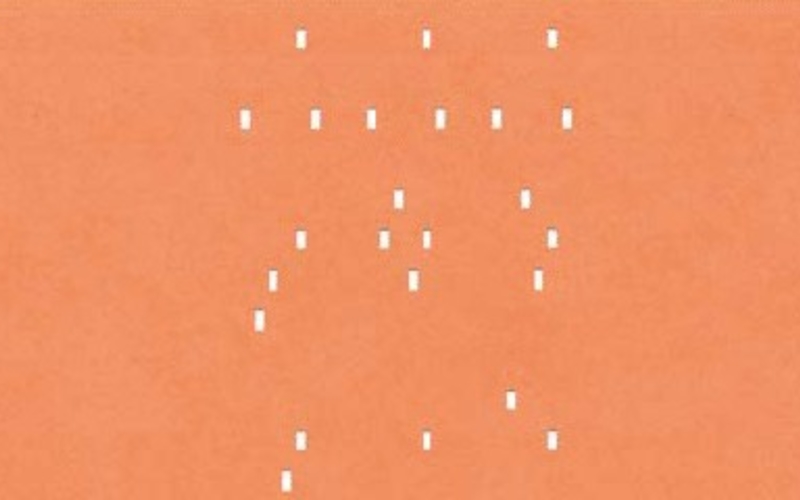 Punched paper with photo offset text. IBM Corporation. IBM punch card. c. 1956. Each: 3 1/4 x 7 3/8" (8.3 x 18.7 cm). The Museum of Modern Art, New York. Gift of Richard Benson.The IBM punch card had its heyday as a data-storage tool from the 1930s to the 1960s. One interesting thing that these cards did, aside from storing data, was translate binary information into electrical signals. Small conductive brushes rested against the card as it was read. If a hole was present, a current flowed; if the paper was solid, it did not. The punched hole was really a switch, and this notion of a switch that was turned either on or off became the basis of the electronic computer. We have to understand some of the principles underlying these devices because the computer and its peripherals will shortly be handling every piece of photography and printing that is done.Punched Paper with Photo Offset Text
 -
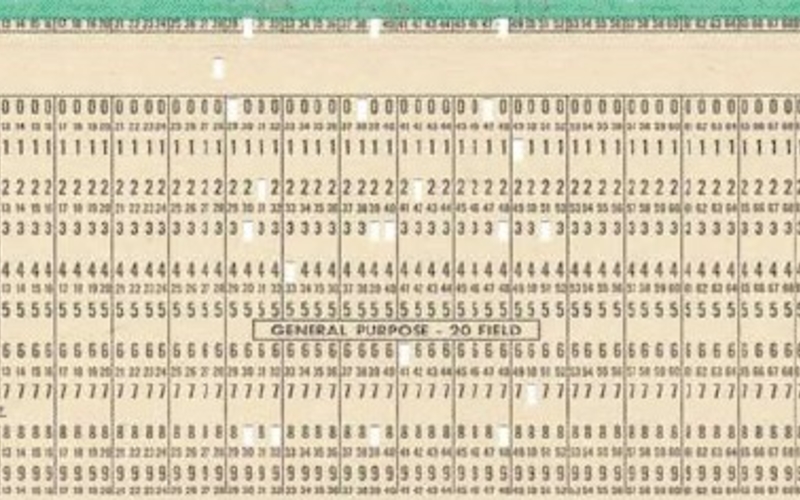 Punched paper with photo offset text. IBM Corporation. IBM punch card. c. 1956. Each: 3 1/4 x 7 3/8" (8.3 x 18.7 cm). The Museum of Modern Art, New York. Gift of Richard Benson.I exaggerate a bit, because there will always be folks who use film and old printing presses, but they—and their work—are already firmly stuck on the banks of the technological river that is sweeping the rest of us away from our solid old analog roots. If we were to pick the best word to describe the precomputer age of technology, it would have to be “analog.” An analog is some physical structure that emulates the form of another. The tones in a black and white photographic negative are a simple analog of the illumination that fell upon that negative during the period of its exposure. The silver deposits change across the negative in continuous variations in density, with one tone smoothly turning into the next.Punched Paper with Photo Offset Text
 -
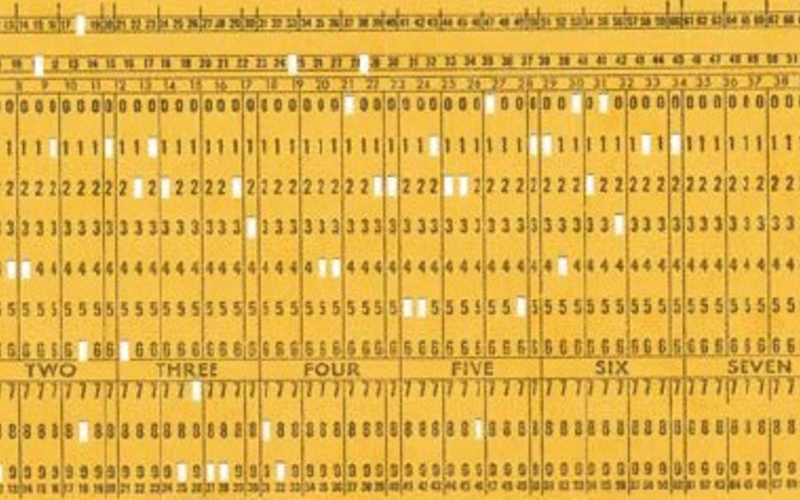 Punched paper with photo offset text. IBM Corporation. IBM punch card. c. 1956. Each: 3 1/4 x 7 3/8" (8.3 x 18.7 cm). The Museum of Modern Art, New York. Gift of Richard Benson.This analog is a simple one because color has been left out; by using black and white film we have chosen to select only a part of the incoming information for our record. That selection, however, is not only smooth and accurate but appears to be continuous and uninterrupted. Until we enlarge it so highly that grains of silver appear, we believe that we are seeing actual tonality in the negative. When such a “continuous tone” negative is digitally scanned into a computer, its information is chopped up into discrete values, each assigned to a particular point on the negative’s surface as a numerical record of the tonal density at that point. Because the computer is electronic, this digitization is in binary form, so that it can be handled by switches turned either on or off. The translation is very similar to the one we see on these IBM cards, with one, major exception: the data in the negative is translated into a tremendous number of values, far more than in the relatively crude cards we see here. Like halftone dots on the printed page, digital information must be plentiful, and must shrink below the resolution of our senses, if it is successfully to imitate the analog from which it derives.Punched Paper with Photo Offset Text
Laser Prints (28:40 - 30:25)
-
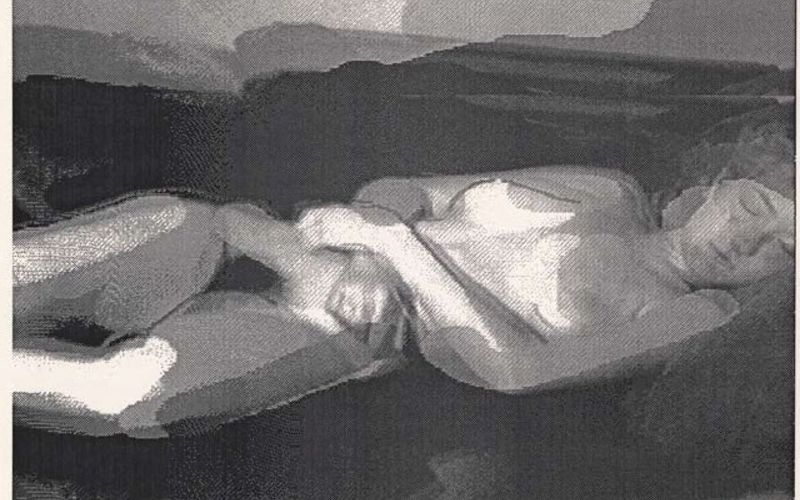 LaserWriter print. Tom Norton. Untitled. 1993. 7 1/16 x 9 1/8" (18 x 23.2 cm). The Museum of Modern Art, New York. Gift of Richard Benson © Tom Norton. Digital devices translate the continuous tone of a photographic image into the on-or-off vocabulary of a printer’s halftone, but the dots typically are much smaller and their patterns can vary considerably. The earliest common digital prints were made with laser printers designed for office use. These machines print fine dots of black toner that can be deployed in bunches to crudely mimic familiar halftone patterns.The earliest electronically driven prints—that is to say, those directed by an electrical signal rather than by light—were crude images sent through radio or by telegraph to printers that burned their data onto specialized paper. Electronic printing didn’t become really common until the spread of the Xerox machine, invented in the 1920s but not widely used until a couple of decades later. The Xerox made copies by brightly illuminating a document—usually black letters on a white sheet—and using the light reflected from it to create a pattern in a static electric charge on a specially prepared plate. The charge on this plate was used to attract oppositely charged black toner onto a sheet of paper, and that deposit was then set by heat, to make a permanent copy. The sensitive plate was usually cylindrical, and the copy machine thus made could produce readable copies rapidly and cheaply.LaserWriter Print
 -
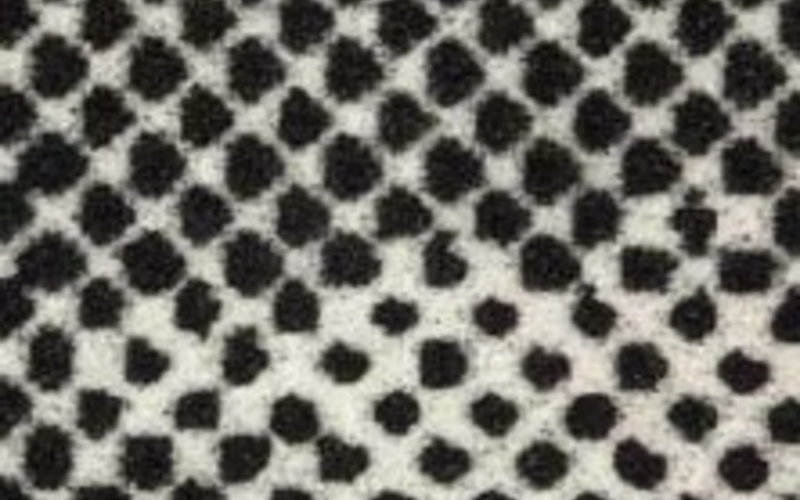 Detail of LaserWriter print. Tom Norton. Untitled. 1993. 7 1/16 x 9 1/8" (18 x 23.2 cm). The Museum of Modern Art, New York. Gift of Richard Benson © Tom Norton. The laser printer has very low resolution and its dots can only be printed as a solid black. In this detail we see the coarse halftone generated by clumping the laser dots together. The halftone pattern thus created is about fifty-six dots per linear inch, seen here enlarged ten times from the print.The Xerox machine underwent a major transformation when new versions were developed that received the image not from a brightly lit sheet but from a binary-driven laser. The light from the laser would dispel the static charge on the plate in any area it struck, and if the beam was finely focused, and turned off and on rapidly, it could lay down a pattern of dots that could form not just letters but also pictures. The letters were built up out of closely spaced black dots—often as fine as 600 per linear inch (this means 360,000 dots per square inch)—but to create the illusion of tone in reproducing pictures, these dots had to be grouped into larger dots, laid down in patterns that emulated the old printer’s halftone.The new laser-printer halftones were quite crude. When a fine array of dots is used to produce a halftonelike pattern, there is an interlock between resolution and tonal gradation. The easiest way to describe this is to say that a halftone (which the laser could build up out of even finer dots than before) might have a certain number of tonal steps, but a version of that halftone with coarser resolution—say half the resolution—might have as many as four times more tonal steps available to it. This is because the laser can build up halftone dots in a larger number of sizes if it has a larger grid to work in—the fewer the halftone dots per inch, the more dots from the laser are available to build up each one. But a larger grid for each halftone dot means coarser resolution of the halftone. Tonal images printed by laser printers can be highly detailed with limited tonality, or tonally complex with low resolution.Detail of LaserWriter Print
The Canon Color Copier (30:46 - 32:05)
-
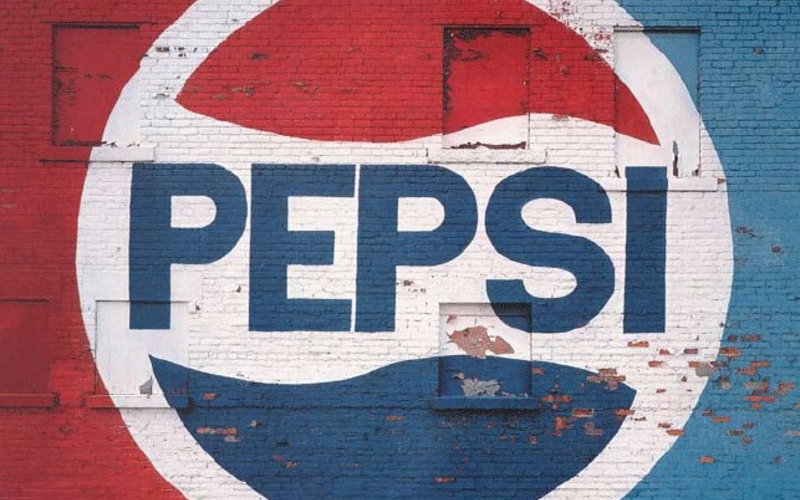 Canon color copier print. Richard Benson. Pepsi Sign. 1994. 10 x 12 5/8" (25.4 x 32 cm). The Museum of Modern Art, New York. Gift of Richard Benson © Richard Benson. To print in color, laser printers use toners in the subtractive primaries. The linear pattern of this print is an alternative to the conventional pattern of halftone dots. This print was made from a digital file produced by scanning an eight-by-ten-inch transparency.In 1987 the Canon company produced a laser copier that made instant images in full color. As in the Xerox machine, the original was laid down on a flat scanning bed and the image was drawn by a laser, but in this case there were four separate drums—one each for cyan, magenta, yellow, and black—that had to have the appropriate static images built on them. Quite early on in the color copier’s life, firms were making computer interfaces for them that allowed them not just to copy a preexisting piece of flat art but to print a digital file. The image quality of these machines is quite high. The toners used are superb and very stable, and the images suffer mainly from an irregularly shiny surface—the toner deposit is often shinier than the paper support, leading to an odd, uneven reflectivity.Canon Color Copier Print
 -
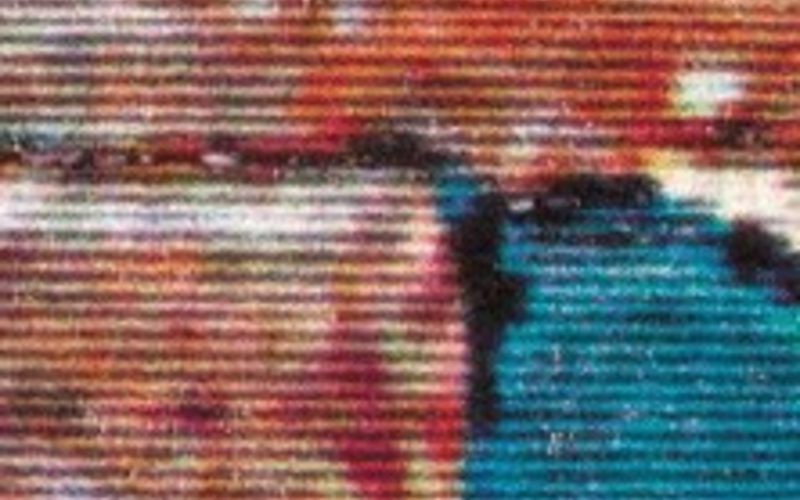 Detail of Canon color copier print. Richard Benson. Pepsi Sign. 1994. 10 x 12 5/8" (25.4 x 32 cm). The Museum of Modern Art, New York. Gift of Richard Benson © Richard Benson. The Canon color copier lays down its toner in a linear pattern, in which the intensity of the lines varies to create changes in tone and color. This detail is enlarged approximately twelve times from the original print.Today all the small instant-print shops have versions of these color copiers, which are manufactured in a variety of brands and types. A few companies (Xerox, Canon, and Agfa among them) decided to turn the laser-driven color copier into a professional production machine, seeking out a market for high-end printing of books and small publications on demand, to avoid the need to produce large print runs before knowing whether or not a given publication would sell. This potential market is the same one that is pursued by the Indigo printer. Print-on-demand bookmaking languished for a while, although the technology was already available, but today many small printshops and university copy centers offer such a service.If the binding and page sizes are standardized these small-edition publications can be quite inexpensive. I haven’t seen much original art done with color copiers, but prints made by these devices are everywhere. A good family snapshot might be copied to make a dozen or so for family members, or a unique watercolor might be copied and framed to be sold to tourists in some waterfront shop. The trouble with all this is that these prints are copies and decidedly inferior to the originals. The colors tend to be saturated, and they have often been falsely sharpened, but even so these second-generation prints are commonly mistaken for originals. Anyone collecting old prints should always bring a magnifying glass along to check that prints for sale are not just color copies. The detail on the previous page shows the fine parallel lines characteristic of the toner deposits from most of these copiers. The resolution on these machines is so fine that they can also emulate the traditional halftone, which gives them a better tonal scale, but with an obvious large halftone dot.Detail of Canon Color Copier Print
Digital Halftones and Stochastic Printing (35:19 - 42:55)
-
 Stochastic print. Richard Benson. Richard and Tanya Donnelly. 1989 (Printed 1994). 11 x 13 3/4" (28 x 35 cm). The Museum of Modern Art, New York. Gift of Richard Benson © Richard Benson.The old printer’s halftone dot was an analog creature, not a digital one. It was binary—which is to say that densities in the halftone negative were either completely opaque or completely clear—but the dot itself varied smoothly in size, from a tiny black dot for the highlights of a print to a tiny white dot, in a black field, for a dark tone. These variations in size were an analog of the tones in the picture. When printing went digital the computer developers faced the problem of how to render this dot with the new tools.Stochastic Print
 -
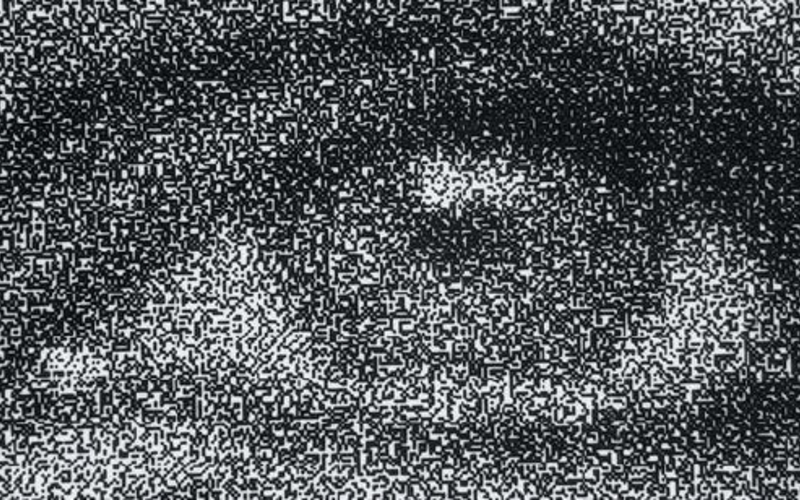 Detail of Stochastic print. Richard Benson. Richard and Tanya Donnelly. 1989 (Printed 1994). 11 x 13 3/4" (28 x 35 cm). The Museum of Modern Art, New York. Gift of Richard Benson © Richard Benson.The solution was to use an exposure device, called an “imagesetter,” with far higher resolution than the halftone dots themselves. When digitally generated film is to be exposed to make a halftone negative for use on an offset printing plate, the exposure device is a fine laser, of the same sort used in a laser printer. If the laser resolution is high enough, it can build up a representation of the halftone dot within a small grid by simply adding more laser dots for each step up in the density required in the final print. If the laser can expose 2,400 dots per linear inch, and a final halftone resolution of 200 dots per linear inch is desired, then the grid within which each dot is built will be 12 laser points per side. Each square in the grid can then fit up to 144 laser dots. A highlight (in a positive piece of film) might be 4 dots clustered together. A mid-tone would be 72 laser dots, set together to emulate a round dot covering half the area of the grid. For a dark shadow tone, nearly black, the grid square would be completely covered with exposed points on the film except for a small group left clear, clustered together, to make a white dot in a black field. By building the image up to emulate the old halftone dot, digital technology can deliver a structure that is virtually identical to the one made by the earlier halftone screens. This makes the offset printers happy.Stochastic screening was a natural extension of this practice. As the offset presses became better and better, and capable of printing extremely fine dots, some smart character figured out that the tiny laser points didn’t need to be clustered to imitate a coarse halftone. In stochastic screening the dots are laid down in the grid in a random pattern, still covering the right percentage of the grid to represent the tone needed in any area, but arrayed as tiny marks in a random pattern. The grain of this pattern can be far finer than in the halftone. Images screened this way have no visible halftone dot when seen by the naked eye, but the resolution of the image is the same as though a coarse dot were still being used. The resolution is determined by the grid size, which remains the same in either case.Detail of Stochastic Print
Iris Prints (43:35 - 47:46)
-
 Iris print. Workshop of Romio Shrestha. The Wheel of Deluded Existence. c. 1995 (Printed by Laumont Editions, 1999). 21 1/4 x 15 3/4" (54 x 40 cm). The Museum of Modern Art, New York. Gift of Richard Benson. Courtesy Callaway Arts & Entertainment, New York.The great digital machine that ushered in the computer age of fine printing was the Iris printer. These inkjet printers were developed in the late 1980s as proofing devices for offset presses. They enjoyed limited success in this role because it turned out to be extremely difficult to make their inkjet image closely resemble the ink-printed halftone image that came out of the large offset printing presses. There were other color proofing systems out there, and the Iris never could compete with them. What these machines did do was make magnificent photographic prints on a wide variety of papers. The Iris used a large, rapidly rotating drum to hold the paper and a set of jets to put down a fine spray of ink. These jets were connected to ink tanks by flexible hoses, which allowed them to move slowly along the drum, parallel to its axis, to cover the entire area to be printed. The machine could lay down both fine lines of ink or ink drops of different sizes in a stochastic pattern.Iris Print
 -
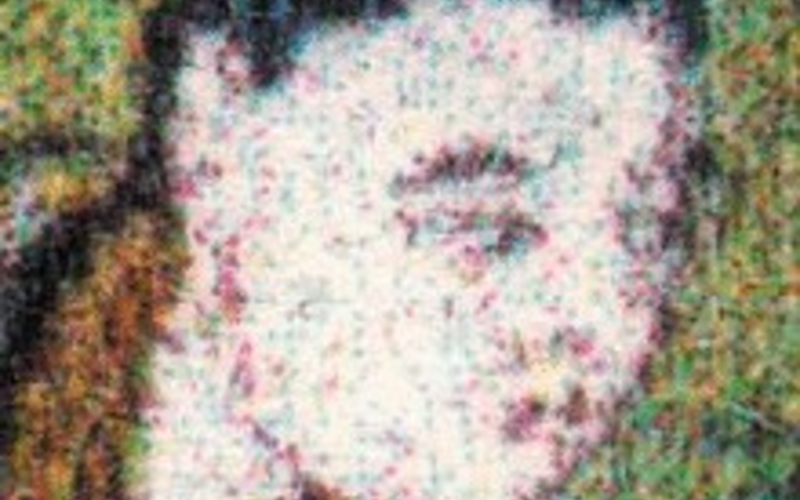 Detail of Iris print. Workshop of Romio Shrestha. The Wheel of Deluded Existence. c. 1995 (Printed by Laumont Editions, 1999). 21 1/4 x 15 3/4" (54 x 40 cm). The Museum of Modern Art, New York. Gift of Richard Benson. Courtesy Callaway Arts & Entertainment, New York. The stochastic dot pattern we see here, enlarged approximately twenty times from the Iris print, appears as cyan, magenta, yellow, and black dots. These tiny points of ink do not vary in value; a dot is either there or not. Because of this go-or-no-go system, any tonal variation must be generated by controlling the number of dots that go down in a given area.In the beginning, the Iris inks were pretty much just water containing dyes similar to food coloring. The deposits were so delicate that any spot of water that fell on them would create a mark, and sunlight faded the image very badly. These difficulties were finally overcome with the development both of better dyes and of various coatings that absorbed ultraviolet light, and that were sprayed onto the prints to improve their stability. Iris prints began to get a foothold in fine-art printing, and at one point some ambitious marketeer decided to call them “Giclée” prints. This deeply stupid name has led many a purchaser to think they have some rarefied creature hanging on their wall when all it is is an inkjet print.“Giclée” has now been applied to prints made with any inkjet printer, so the purchaser of one of these prints can’t even be sure of getting an Iris print. The Iris printer created, for the first time, marvelous photographic prints with highly saturated colors on a truly matte surface. Papers were made with matte surfaces for traditional, chemical color photography, but those papers had always produced inferior colors. The legacy of the Iris, which continues today in all the small- and wide-format inkjet printers, is to produce soft, matte yet intense colors, unlike any that had been seen before. Black and white photographers had the platinum print for matte images but there was no comparable method for color. If an Iris was made on a good rag paper, with the correct sizing, it could produce a tonal scale unmatched even today. Unfortunately a lot of poor pictures were made on fancy paper, complete with deckle edges and sold as high art, but when an Iris print was right, nothing could touch it for out-and-out image quality. There are still a few Iris printers in use, but the superb modern inkjet printers have driven the Iris into obsolescence.Detail of Iris Print
Dye-Sublimation Printing (32:06 - 35:16)
-
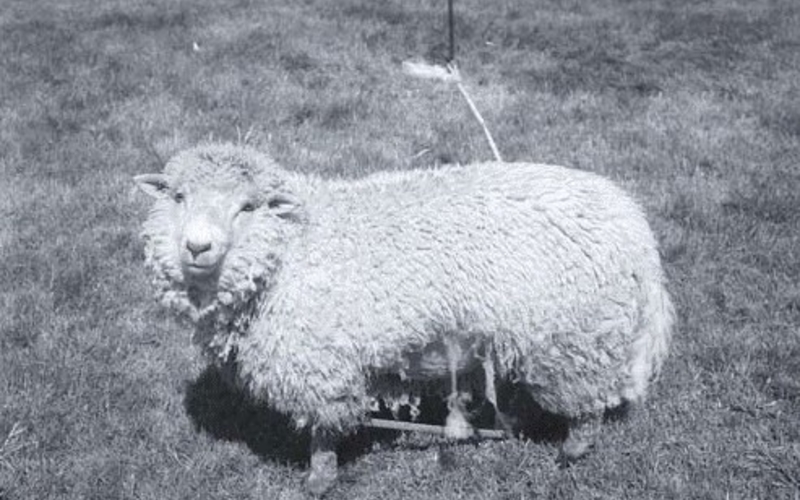 Dye sublimation print. Richard Benson. Tethered Sheep. 1995 (Printed 1998). 7 1/2 x 9 1/2" (19 x 24.1 cm). The Museum of Modern Art, New York. Gift of Richard Benson © Richard Benson. In the dye sublimation process, originally refined for military use, tiny heating elements transfer dyes to a paper support. This particular print was made using a single layer of black dye.Very early on in the digital upheaval a completely new kind of photographic printer appeared. Called the “dye sublimation” printer, it used tiny heating elements to force a dye onto a receiver sheet. The prints it made were usually eight by ten inches in size, although I remember one model that went up to eleven by seventeen; I don’t know of any that went larger than that. The first one I saw was at a small digital workshop up in Camden, Maine, that was funded by the Eastman Kodak Company. The printer, called a Kodak 7000, was an odd-looking device, plain in design, with a pair of handles on the front. It only took me a minute to realize that it had been designed to slip into a rack, like those that held radio equipment in the ham-radio age. I asked the Kodak technician why the machines were designed that way and he said it was so they could fit into the racks of the B-52 bombers for which they were made. These printers were developed so that instant color prints of targets could be generated right on the plane. Like so much other technology that we love, this one came to us from the military.Dye Sublimation Print
 -
 Detail of Dye sublimation print. Richard Benson. Tethered Sheep. 1995 (Printed 1998). 7 1/2 x 9 1/2" (19 x 24.1 cm). The Museum of Modern Art, New York. Gift of Richard Benson © Richard Benson. This twenty-five-times enlargement from the print shows the soft squares of tone generated from the black dye layer in this black and white print. Unlike a hard halftone or stochastic dot, these patches of dye have variable tonality, deriving from the modulated heat used to transfer the dye.The dye-sub printer uses a long roll of clear acetate holding solid layers of dye in the three subtractive primaries and black. When a print is made, a special sheet of paper is drawn into the printer and held next to one of the dye layers on its acetate support. Together they are wrapped around a drum. A set of heating elements 200 per linear inch is lined up across the drum, to be selectively fired by the digital file holding the picture information for that color. As the paper/ dye combination moves beneath these heaters, the dye is activated and moves over to the paper receiver. Once a single layer of dye has transferred, the paper is aligned with the section of the acetate sheet holding the next color and the heating operation is repeated, again driven by a file for that color. This is done four times; finally the machine ejects a completed color print. After a single print is made, the length of the acetate support holding the used-up areas is rolled up and a fresh section is ready for the next print.Detail of Dye Sublimation Print
 -
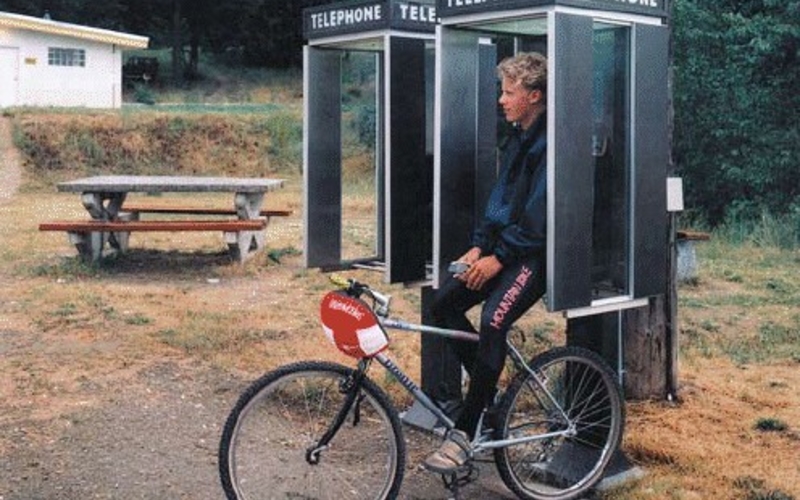 Dye sublimation print. Richard Benson. Boy on Bicycle. 1995 (Printed 1998). 7 1/2 x 9 1/2" (19 x 24.1 cm). The Museum of Modern Art, New York. Gift of Richard Benson © Richard Benson. This dye sublimation print has four layers of dye: cyan, magenta, yellow, and black. There are about two hundred tonal elements per linear inch, but because each small patch of color has soft edges and incorporates internal variants of tone and color, the print appears to have a far higher resolution.Dye sublimation prints look very much like traditional chromogenic prints. They have terrific colors, saturated and smooth, and their surface is usually moderately gloss (although matte paper supports are also made). These printers can also make superb black and white prints, using only the black section of the color band. When examined by magnifying glass the dye appears in soft squares, 40,000 to the square inch. Because the values within each square vary in tone and color, they assemble together smoothly to the unaided eye and look like a high-resolution continuous-tone print. The old halftone screen, in sharply defined solid colors, shows up easily at this same resolution, but the dye sub’s soft, particulate structure disappears, just like the stippling in chromolithography.Dye Sublimation Print
 -
 Detail of Dye sublimation print. Richard Benson. Boy on Bicycle. 1995 (Printed 1998). 7 1/2 x 9 1/2” (19 x 24.1 cm). The Museum of Modern Art, New York. Gift of Richard Benson © Richard Benson. These patches from the color print are enlarged approximately twenty-five times.Detail of Dye Sublimation Print
Early Inkjet Prints (47:37 - 48:21)
-
 Hewlett-Packard plotter print. Richard Benson. New York State Barn. 1993. 19 3/8 x 15 1/2" (49.2 x 39.4 cm). The Museum of Modern Art, New York. Gift of Richard Benson. © Richard Benson.Even prior to the Iris printer, crude inkjet printers were used to produce architectural drawings. Called “plotters,” these devices used black ink and could turn a computer file into a large drawing to be used in construction projects. The old method of making working copies of drawings was to use a chemical process, such as blueprinting, to reproduce a handmade drawing. The plotter produced a paper version of a drawing that had been made with a computer illustration program, opening the door for the large staffs of draftsmen in architectural firms to become smaller groups of computer operators.Hewlett-Packard Plotter Print
 -
 Detail of Hewlett-Packard plotter print. Richard Benson. New York State Barn. 1993. © Richard Benson. The early plotters adapted to photographic use had a relatively coarse dot pattern; this detail is enlarged eight times from the print.The plotter soon had colored inks, to allow the emulation of drawings with color. (We must always remember the power of color to sell things, whether in a meeting called to sell a wealthy client on an architectural design or on Wal-Mart packaging.) It wasn’t long before these machines were used to make prints of photographs, and by the early 1990s a few manufacturers were producing them as wide-format color photographic printers. This particular print is one I made around that time, by scanning an eight-by-ten-inch Ektachrome transparency with an early drum scanner (to make a thirty-megabyte file, which at the time I thought was immense). The print has pretty good color, only a few streaks, and quite a heavy rendition of the shadow areas. The paper I used was designed to dry the ink rapidly and looks like a sheet of plastic.The early inkjet printers differed from the Iris printer in that the printing head moved rapidly back and forth across the sheet of paper and after each “pass” the paper advanced a tiny bit so another line of dots could be laid down. The rapidly rotating drum of the Iris, holding a large piece of paper, was eliminated. Since there was no reason to imitate the old halftone, the printers used stochastic screening, and they underwent steady refinement, with new models coming out every year or so. Before long the inkjet printer shook off its architectural roots and became a superb color printing device, laying dots down at a resolution far higher than could be seen by the naked eye. Some of these machines were large, able to print pictures forty-four inches wide by any length, but a whole new type was developed that printed on letter-size or slightly bigger paper. These little machines—desktop printers to accompany the desktop computer—were cheap to buy but expensive to use, because their economic basis was the sale of ink. A printer for letters and family photographs might cost less than $100, but within a very short time the buyer would have spent more than that on ink if a lot of picture printing was done. The machines came with a set of ink cartridges, so the owner became hooked on the new prints well before having to face the $20 cost for each replacement.Detail of Hewlett-Packard Plotter Print
Modern Inkjet Printing (49:33 - 50:44)
-
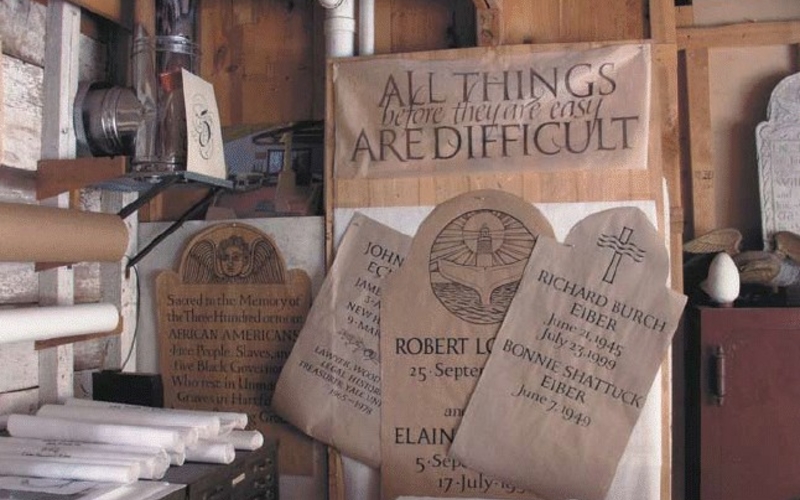 Inkjet print. Richard Benson. All Things Are Difficult Before They Are Easy. 1998. 7 1/4 x 9 5/8" (18.4 x 24.5 cm). The Museum of Modern Art, New York. Gift of Richard Benson © Richard Benson. Using stochastic dot patterns in the subtractive primaries, the inkjet printer has come to dominate amateur and professional photographic printing and it produces the overwhelming majority of today’s digital prints. This picture was made with an early Olympus.Even though the inks cost a lot, desktop inkjet printers are absolutely wonderful. We need to remember that all the old chemical materials were even more expensive, due to the presence of silver in their coatings. With the new digital printers we become frustrated at the cost of the inks but conveniently forget that we use these machines to make far more prints than we ever made in the darkroom. Had we tried back then to predict what printing device would come out of the computer age, we would never have dreamed up these printers. They are inexpensive, rarely break, print rapidly, and make prints that look as though they have the full tonal and color range of an actual chemical print. This last attribute comes because the technology of the print head has made extraordinary strides.Inkjet Print
 -
 Detail of Inkjet print. Richard Benson. All Things Are Difficult Before They Are Easy. 1998. 7 1/4 x 9 5/8" (18.4 x 24.5 cm). The Museum of Modern Art, New York. Gift of Richard Benson © Richard Benson. As the inkjet printer evolved, the dot structure became finer; this detail has been enlarged approximately twelve times from the print.On the best machines these tiny jets, grouped for each color, are able to put down droplets of ink at a resolution of 2,880 per linear inch, which means that a single square inch, if fully covered, could hold over eight million separate deposits. The computers themselves—their memories and processors—have all grown in speed and data-handling capacity to match the ability of the printers to lay down ink. We tend to ignore the miraculous technological path that is traveled every time we click a computer’s print button. Inkjet prints do have some problems. In the beginning, prints made this way tended to fade badly, but by this time (2007) the dyes and pigments used in the best inks are even more permanent than those in the older chemical chromogenic print.There is still a fragility to the prints, partly because they are sensitive to bad chemistry in the air, but also because the ink deposits are physically delicate. The old chemical prints could be manhandled and still remain intact—a pile of silver prints could be shuffled around and perhaps some surface scratching would occur, but the prints would probably still be OK. Do this with a pile of inkjet prints and very soon every one will be ruined. This is such a problem that when I print my own pictures and manage to get a good one, I immediately put it in an overmat, reversing my forty-year-old habit of storing photographs in unprotected piles. You would think that a replacement could be made simply by pressing the print button again, but computers, software, printers, and inks change so rapidly that one never knows if a good print can be made again. Perhaps the most irritating problem with the inkjet prints is that they look very different under different viewing lights. A print that is fine under tungsten light turns quite green under daylight and might shift to red when viewed under fluorescent light. The ink-makers are gradually solving this problem, called “metamerism,” but even today a great-looking inkjet print can take on a distressing color cast when viewed under different conditions from those for which it was made.Detail of Inkjet Print
Black and White Inkjet Printing (50:44 - 53:31)
-
 Inkjet print. Richard Benson. Untitled (child in back seat of car). c. 1990. 15 1/2 x 10 7/8 (39.3 x 27.7 cm). The Museum of Modern Art, New York. Gift of Richard Benson © Richard Benson. The question of permanence is present in every printing process. The print on the left and the print on the next page—made at the same time, on the same paper, with aftermarket monochromatic inks—started out as neutral gray. One print has turned green and the other brown. These changes might simply reflect the author’s sloppy storage, but they could also be due to inferior paper or the presence of volatile chemicals in the air. Whatever the case, some digital prints are surprisingly fugitive in color. Ink manufacturers expend a great deal of research on developing inks that do not fade, but light is corrosive for all pictures.The metamerism problem—of prints shifting color under changing lighting conditions—is particularly bad for black and white inkjet prints. If we make a beautiful black and white print, tuned so the tones are neutral, it is disturbing to walk across the room with it, toward a window, and find the image becoming green. This happens because the bulk of the inks that make up the picture are in the subtractive primary colors. They may be carefully balanced to produce neutral tones when printed in nearly equal amounts at any one spot, but that balance depends upon a specific light source being used to view the print.Inkjet Print
 -
 Inkjet print. Richard Benson. Untitled (child in back seat of car). c. 1990. 15 1/2 x 10 7/8 (39.3 x 27.7 cm). The Museum of Modern Art, New York. Gift of Richard Benson © Richard Benson. This print started out as neutral gray and turned brown over time.All inkjet printers have black inks in their ink set, but a print made with just that one ink will be rough and tonally poor. The smooth values in any inkjet print come from building up the image with at least four sets of dots, each in a different ink, and only by using inks in the primary colors can we print both color and black and white pictures with the same ink set. The minute we change viewing lights, such prints can shift in color.This difficulty can be solved in two ways. One is to use a carefully designed “RIP,” which stands for “raster image processor.” The file we handle in the computer is not the one that drives the printer. Printers differ from computers in their design, so another translation is needed: a specialized file, which we never see or manipulate, is made to create the final print. The RIP is the device that produces this hidden but essential digital printing file. When used with normal colored inks, a good RIP will make up most of a black and white image out of the black ink (some printers even add an additional gray ink), then supply tone and smoothness by printing weak arrays of colored dots as well. As the percentage of colored ink in a print diminishes, so too does the metamerism problem. The second solution is to give up on making color prints and install a set of monochromatic inks in the printer. Some companies produce these as aftermarket additions, and they can make extraordinary prints that are stable, tonally spectacular, and completely free from color shifts.Inkjet Print
 -
 Inkjet print with monochromatic inks. Steve Smith. Las Vegas, Nevada. 1996. 10 3/4 x 13 1/2" (27.3 x 34.3 cm). The Museum of Modern Art, New York. Gift of Richard Benson © Steven B. SmithThese monochromatic ink sets use one or more black inks and various weights of gray. The cartridges or tanks in the printer are replaced with these new ones, and specialized software is installed in the computer to build print tones that match the monitor display. One of the pioneers in the development black and white ink sets Jon Cone even developed new software that lets the inkjet put down a diffuse dot, producing a print that looks truly tonal, even under the magnifying glass. A fine print made with these inks and that dot structure is as rich in grays as anything silver produced in the history of chemical photography.Inkjet Print with Monochromatic Inks
Digital Chromogenic Prints (53:32 - 56:51)
-
 Digital chromogenic print. Robert Bergman. Untitled from A Kind of Rapture (New York: Pantheon Books, 1998). 1989. 36 13/16 x 24 7/16" (93.5 x 62 cm). The Museum of Modern Art, New York. Gift of Richard Benson © Robert Bergman. In the 1990s a new technology emerged that exposes conventional color photographic paper directly from a computer file, using red, green, and blue lasers. These new “digital C-prints” are indistinguishable from traditional chromogenic prints and are enjoying a rich life in the gallery world.The physical fragility of inkjet prints, and the lack of great gloss and semigloss paper surfaces, has tended to keep them out of the galleries in which photography is classed as high art and sold for substantial sums of money. The dependable old C-print had become the standard for a color photograph that could be sold to a collector or museum, and the computer age grew in influence without really intruding on this old practice. But the computer had long since proved itself a miracle machine for retouching and altering photographs, and for a while in there—roughly 1990 to 2000—the practice arose of scanning an original photograph, doctoring it on the computer, and then generating a new piece of continuous-tone film from it in a device called a film recorder. This machine used tiny lasers to expose the new film, often at a resolution of 10,000 lines per inch, and these new transparencies were to all intents and purposes identical to film exposed in the camera.The really big difference was that the image had been manipulated by the computer in the picture’s intermediate electronic stage, straining photography’s already dubious connection to the truth even further. The newly output transparencies were ideal for the advertising trade—they built perfectly upon the foundation of deception that underlies much advertising. Toward the century’s end, a new printer came along that eliminated the film recorder by exposing color photographic paper directly with lasers driven by a computer file. This new machine was extremely expensive, costing over a quarter million dollars, but it could output a flawless C-print, indistinguishable from one made chemically in an enlarger. This technology was accompanied by newly developed chromogenic papers that had far greater permanency than the earlier ones. The work flow for these prints then became exposure of the film in the camera; development; scanning of that film; manipulation of the resulting file in the computer; and then direct output onto conventional chromogenic photographic paper. These new prints slipped easily into the art world, becoming the standard method for producing digitally manipulated color photography with the same respectability as the older, chemical color prints. We must be very clearheaded about this. There is absolutely nothing wrong with altering or otherwise doctoring a photograph in the computer. Photographs cannot be relied upon to render any sort of truth about the world from which they have been made, and every chemical photographic process that has ever existed involves a degree of handling and manipulating of photographic information to suit the photographer’s wishes. If there is any drawback to this new way of exposing the old papers it is that the making of the print is handed over to a laboratory, breaking the ancient practice of the artist physically doing the work of making art.Digital Chromogenic Print